The Arduino IDE
The Arduino IDE (Integrated Development Environment) is where you’ll write your code. It’s also where your code will be processed and sent to your Arduino.
There are two main versions of the Arduino IDE. The Web Editor which enables you to write code in your browser and save it online, and the offline editor IDE software package that you download and install on your PC.
The Web Editor does require a browser plugin to be installed (the Create Plugin), but doesn’t require any further software installations (unless you’re using a clone board, see below). While this approach may be convenient for some, it’s not the approach I use and some of the IDE. This means that some of the instructions and screenshots I provide may not fully align with your experience if you’re using the Web Editor. Full instructions on preparing the Web Editor IDE can be found here: https://docs.arduino.cc/arduino-cloud/getting-started/getting-started-web-editor.
The offline editor IDE requires a full install. I’ve always used the offline editor as it means I can easily carry out some more advanced tasks like tinkering with libraries. It comes in two flavours, IDE1 and IDE2, but the only reason I can find for using IDE1 is if you’ve already used it and are alreayd familiar with it. IDE2 is an upgrade and should do everything IDE1 can do and more. Full details for installing and using IDE2 can be found here: https://docs.arduino.cc/software/ide-v2.
Selecting the correct port and installing device drivers for clone boards
The port is the channel over which your computer will communicate to your Arduino board. It’s technically a virtual serial port, but we don’t need to worry about what that means here.
As we mentioned in Getting started with Arduino – Choosing your first Arduino, clone boards are likely to require additional software in order for your computer to recognise them. The first thing to do is check if your computer has recognised your board, and, if it is, telling the Arduino what port to use.
The easiest way to do this is on any system is to load up the Arduino IDE and follow these steps:
With the Arduino disconnected, click “Tools” and click “Port”. This will give you a list of ports available. You’re likely to have one or none present. If you do see any, make a note of the port numbers. In my example below, you see that I have one port already present which shows as COM1:
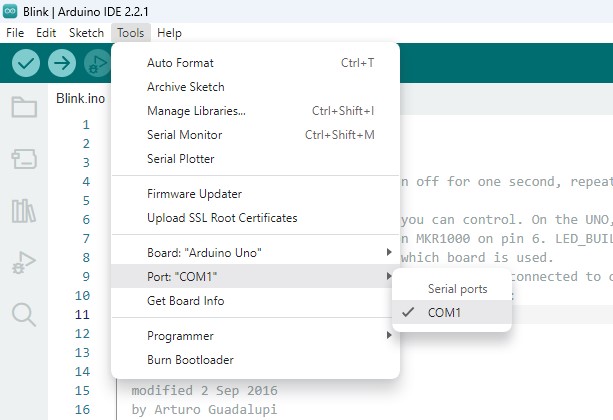
Click away from the menu items to collapse them and connect your Arduino board. Now follow the above step again and, if your board is recognised by your computer, an additional port will appear. If your device is recognised, you’ll see an additional port. See my example below:

If you do see an additional port, select it as this is your board.
Installing the CH340 device driver software
If you follow the above steps and don’t see an additional port when you connect your Arduino board, you should try installing the CH340 device driver. You can download it by clicking one of the following links:
Once downloaded, you’ll have to extract the folder and double click on the installation file to install. Follow the on screen prompts and restart the computer when done.
Once the computer has been restarted, check to see if your board is now recognised.
If your board is still not recognised the following advise might help to diagnose the cause:
- Check all connections are secure
- Check the USB cable and Arduino board for damage
- Use alternative USB port
- Use an alternative USB cable
- Follow the above process on another computer
If those steps also fail, it’s likely that you have a faulty board.
Configuring the Arduino IDE to work with your board
So now, all being well, you have your board recognised and the correct port selected. The next step is simply to select the correct board for the Arduino to program. This is necessary because 1) The IDE converts your code to a code that your board can read and this can differ from board to board 2) The method of communicating to different boards can vary and 3) Different boards have different amounts of various memory types – with the correct board selected, the IDE can advise if you’re trying to use too much.
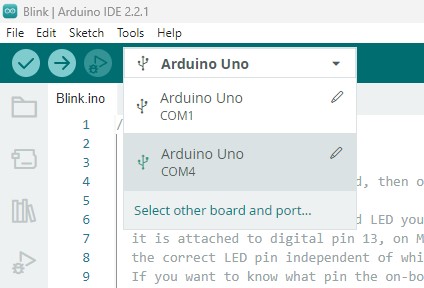
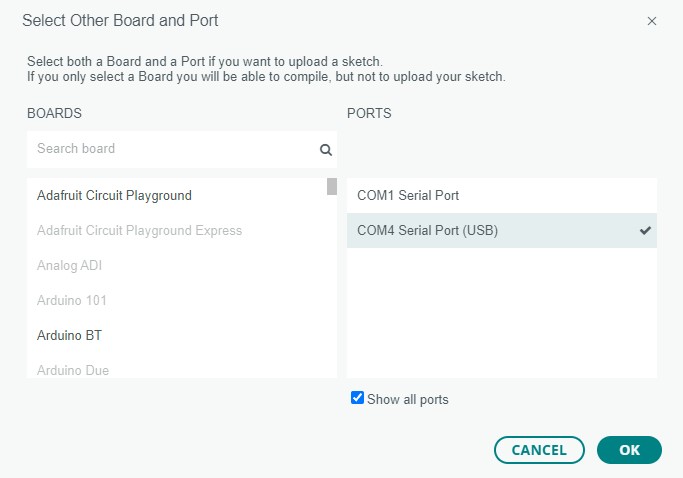
To select the board, click the dropdown at the top of the IDE screen (the first image below) and it’ll show any boards that have been previously used. If your board isn’t shown, click “Select other board and port” then, on the resulting screen (the second image below), you can search for your board, select it and confirm the selected.
Uploading code to your Arduino
You’re now ready to upload the first piece of code (sketch) to your Arduino. Don’t worry if you’re not quite sure how to write code yet, we’ll cover that soon. For now, we’re going to start with one of many built in code examples.
Click File > Examples > Basics > Blink, as below:
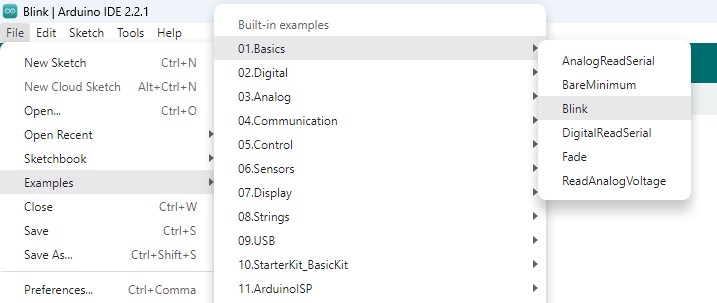
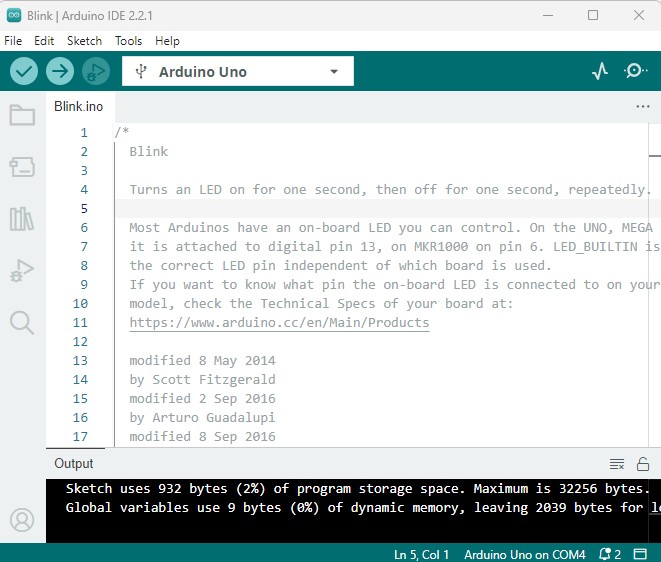
This loads up an example sketch that will blink the inbuilt LED on your Arduino board. All that’s left to do now is compile the code and send it to your board. This can be done in one step by clicking the right arrow at the top left of the screen:
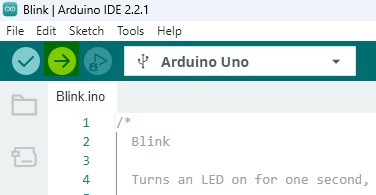
If all has gone well, you’ll see some flashing lights on your Arduino board while the code uploads. You should then see a light continuously flashing on for a second and then off for a second. Congratulations, you’ve uploaded your first sketch!
Experimenting
While we will certainly cover basic coding concepts and more advanced topics in the coming posts, you’re already in a position to experiment.
Take a look at your code. Do you see where it says delay(1000);? What do you think that does? What might happen if you change the number? Only one way to find out!
This is where the fun starts, and there’s a lot more to come!
Problems
It’s very difficult to write a single post that addresses every possible scenario. While I’ve recommended two boards in my previous post, Arduino – Choosing your first Arduino, you may have decided to purchase a different board. Even if you followed my recommendations, you may have purchased a clone board that works slightly differently.
If you do come across any problems and this post doesn’t help, please leave a comment and I’ll do my best to help.
Further reading
I recommend that you read through other posts in this series:

